|
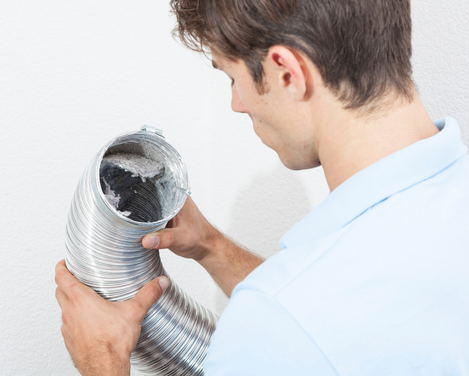
Your dryer is priceless! In the winter it ensures that your laundry is dried thoroughly, and, in the summer, it makes it comfortable and supple. In all seasons it also means that you cut your ironing time in half if not more. There are many signs that your dryer vent needs cleaning. These can include burning smells, an excess of lint and your clothes taking longer to dry. So, it is vital, as we will expose in this article, to know how to clean your dryer vent. Beware of dryer fires Dryer fires are one of the leading causes of house fires in Canada. When you put laundry in the dryer, three elements can start a fire: lint, heat, and moisture. Drying clothes creates lint, which can pile up in the dryer's filter. And if there is too much heat or sparks from the dryer, that can set off the lint. Moisture can cause lint to stick to the machine where it should not, and this is the main purpose for your lint filter. If it gets clogged, your dryer will not be able to work properly. The biggest danger when using a dryer is that the vent can become disconnected from the wall, which can cause lint and debris to build up behind the dryer, near the heating elements. This can be a fire hazard. Make sure the vent is connected to the wall properly each time you use the dryer, and if you see moisture around your dryer, that is a sign something is not right. Wetter clothes will cause moisture to accumulate on the sides of the venting pipe, which will act like a glue for lint. This can lead to significant build-up and clogging of the vent in a short amount of time. Cleaning the dryer vent The first and most important step when cleaning your dryer vent is to turn off the power to the dryer. You should not do any work on the vent while the appliance is still drawing power. So, unplug your appliance but keep in mind that this may require you having to move the dryer so enlist some help if it is too heavy. Once the power is off, locate the vent. It is a large, silver, or white pipe that comes out of the back of the dryer. It is about 4 inches in diameter and can be made with flexible white vinyl, thin aluminum foil, semi-rigid aluminum, or completely rigid aluminum piping. Follow the vent hose to the outdoor pipe where it exits the home. There are likely brackets that hold the vent in place. Then, pull the dryer out and using a screwdriver, loosen the clamps that keep the dryer vent hose attached to the wall. Make sure that you have a garbage bag ready to catch all the debris especially if the vent has never been cleaned before. Next, remove the vent hose by loosening its bracket and using a vacuum cleaner, suck out all the clumps of lint. This can be done from both ends of the duct. Finally, reattach the hose and clean the exterior vent by vacuuming any dust and debris. Let the professionals do what they do best! It is essential here to mention that the cleaning process can be quite difficult depending on where your dryer is situated and that you can also unwillingly damage your vent and its hose. A DIY clean may not be thorough enough as it is unlikely that you have in your possession powerful professional equipment. This being said, and keeping in mind that this cleaning only needs to happen on a yearly basis, it is strongly recommended to use a professional company that specializes in dryer vent cleaning. This will not only save you the hassle of doing the job yourself, but it will also ensure that the work is thorough thus reducing the risk of a potential house fire.
Comments are closed.
|
AuthorDuct Cleaning Ottawa Pro offers you the best advice about duct cleaning Archives
June 2024
Categories |
Duct Cleaning Ottawa Pro
17 Spadina Avenue, K1Y2B8, Ottawa
(343) 805-0192
17 Spadina Avenue, K1Y2B8, Ottawa
(343) 805-0192
|
Our Cleaning Services:
Air Duct Cleaning services Dryer Vent Cleaning services Furnace Cleaning services HRV system cleaning services Bathroom exhaust cleaning services Wall Mounted Heat Pump cleaning service Air Exchanger Cleaning service Coil cleaning services Carpet and Upholstery Cleaning services Area Rug Cleaning services Commercial Duct cleaning services Commercial Dryer Vent Cleaning services Commercial Carpet and Rug cleaning services |


 RSS Feed